Starting with DogQ
Create your first Project
You can visit our Registration page and select one of the possible sign-up options (Github or via Email). If you're signing up via Email, choose your Team's name. Within this Team, you can later invite your teammates and create projects.
After Sign Up, you can create your first Project:
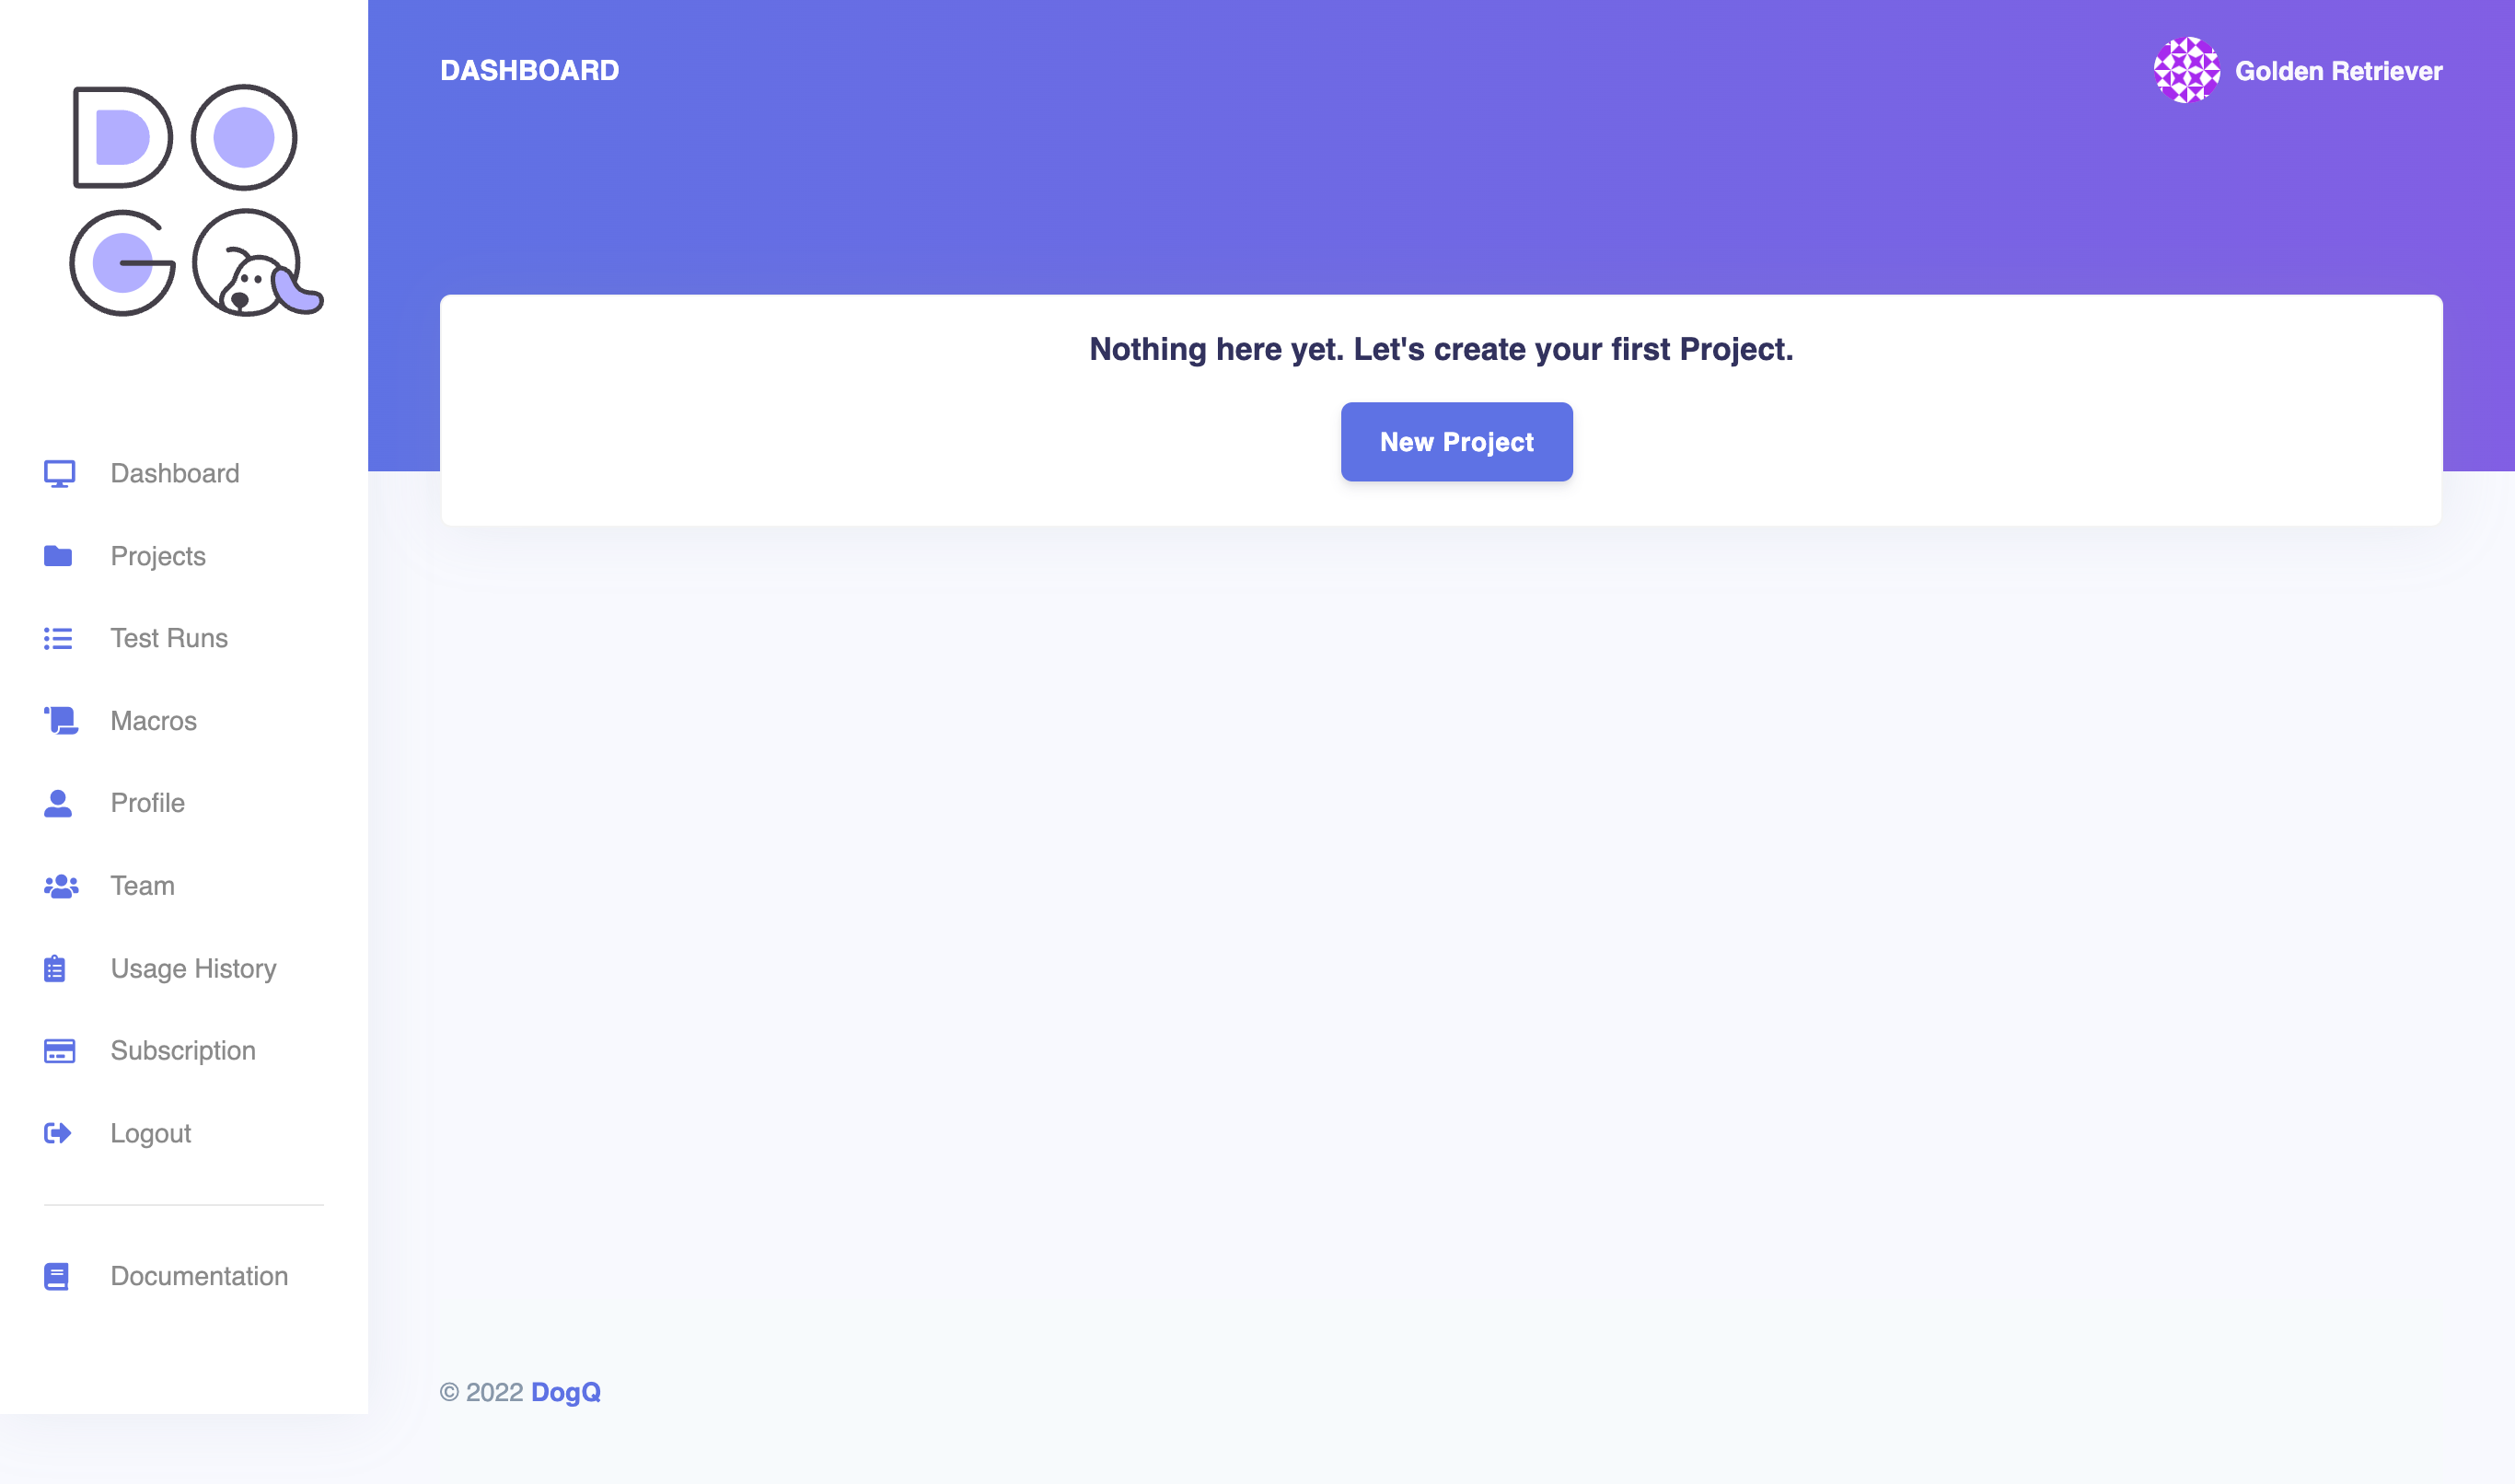
By clicking on the “New Project” button, you will be forwarded to the Project creation page. There you can specify the Project name, how often you would like to get the email notifications about the scheduled Project executions, and the default first step for all the Scenarios of this Project. But only the ‘Name’ field is mandatory, so let’s skip all other fields for now:

Project is the central entity of DogQ. You can create all application Modules and Scenarios in the Project and later monitor them with the Test Runs. We will talk about these terms next.
Create your first Module
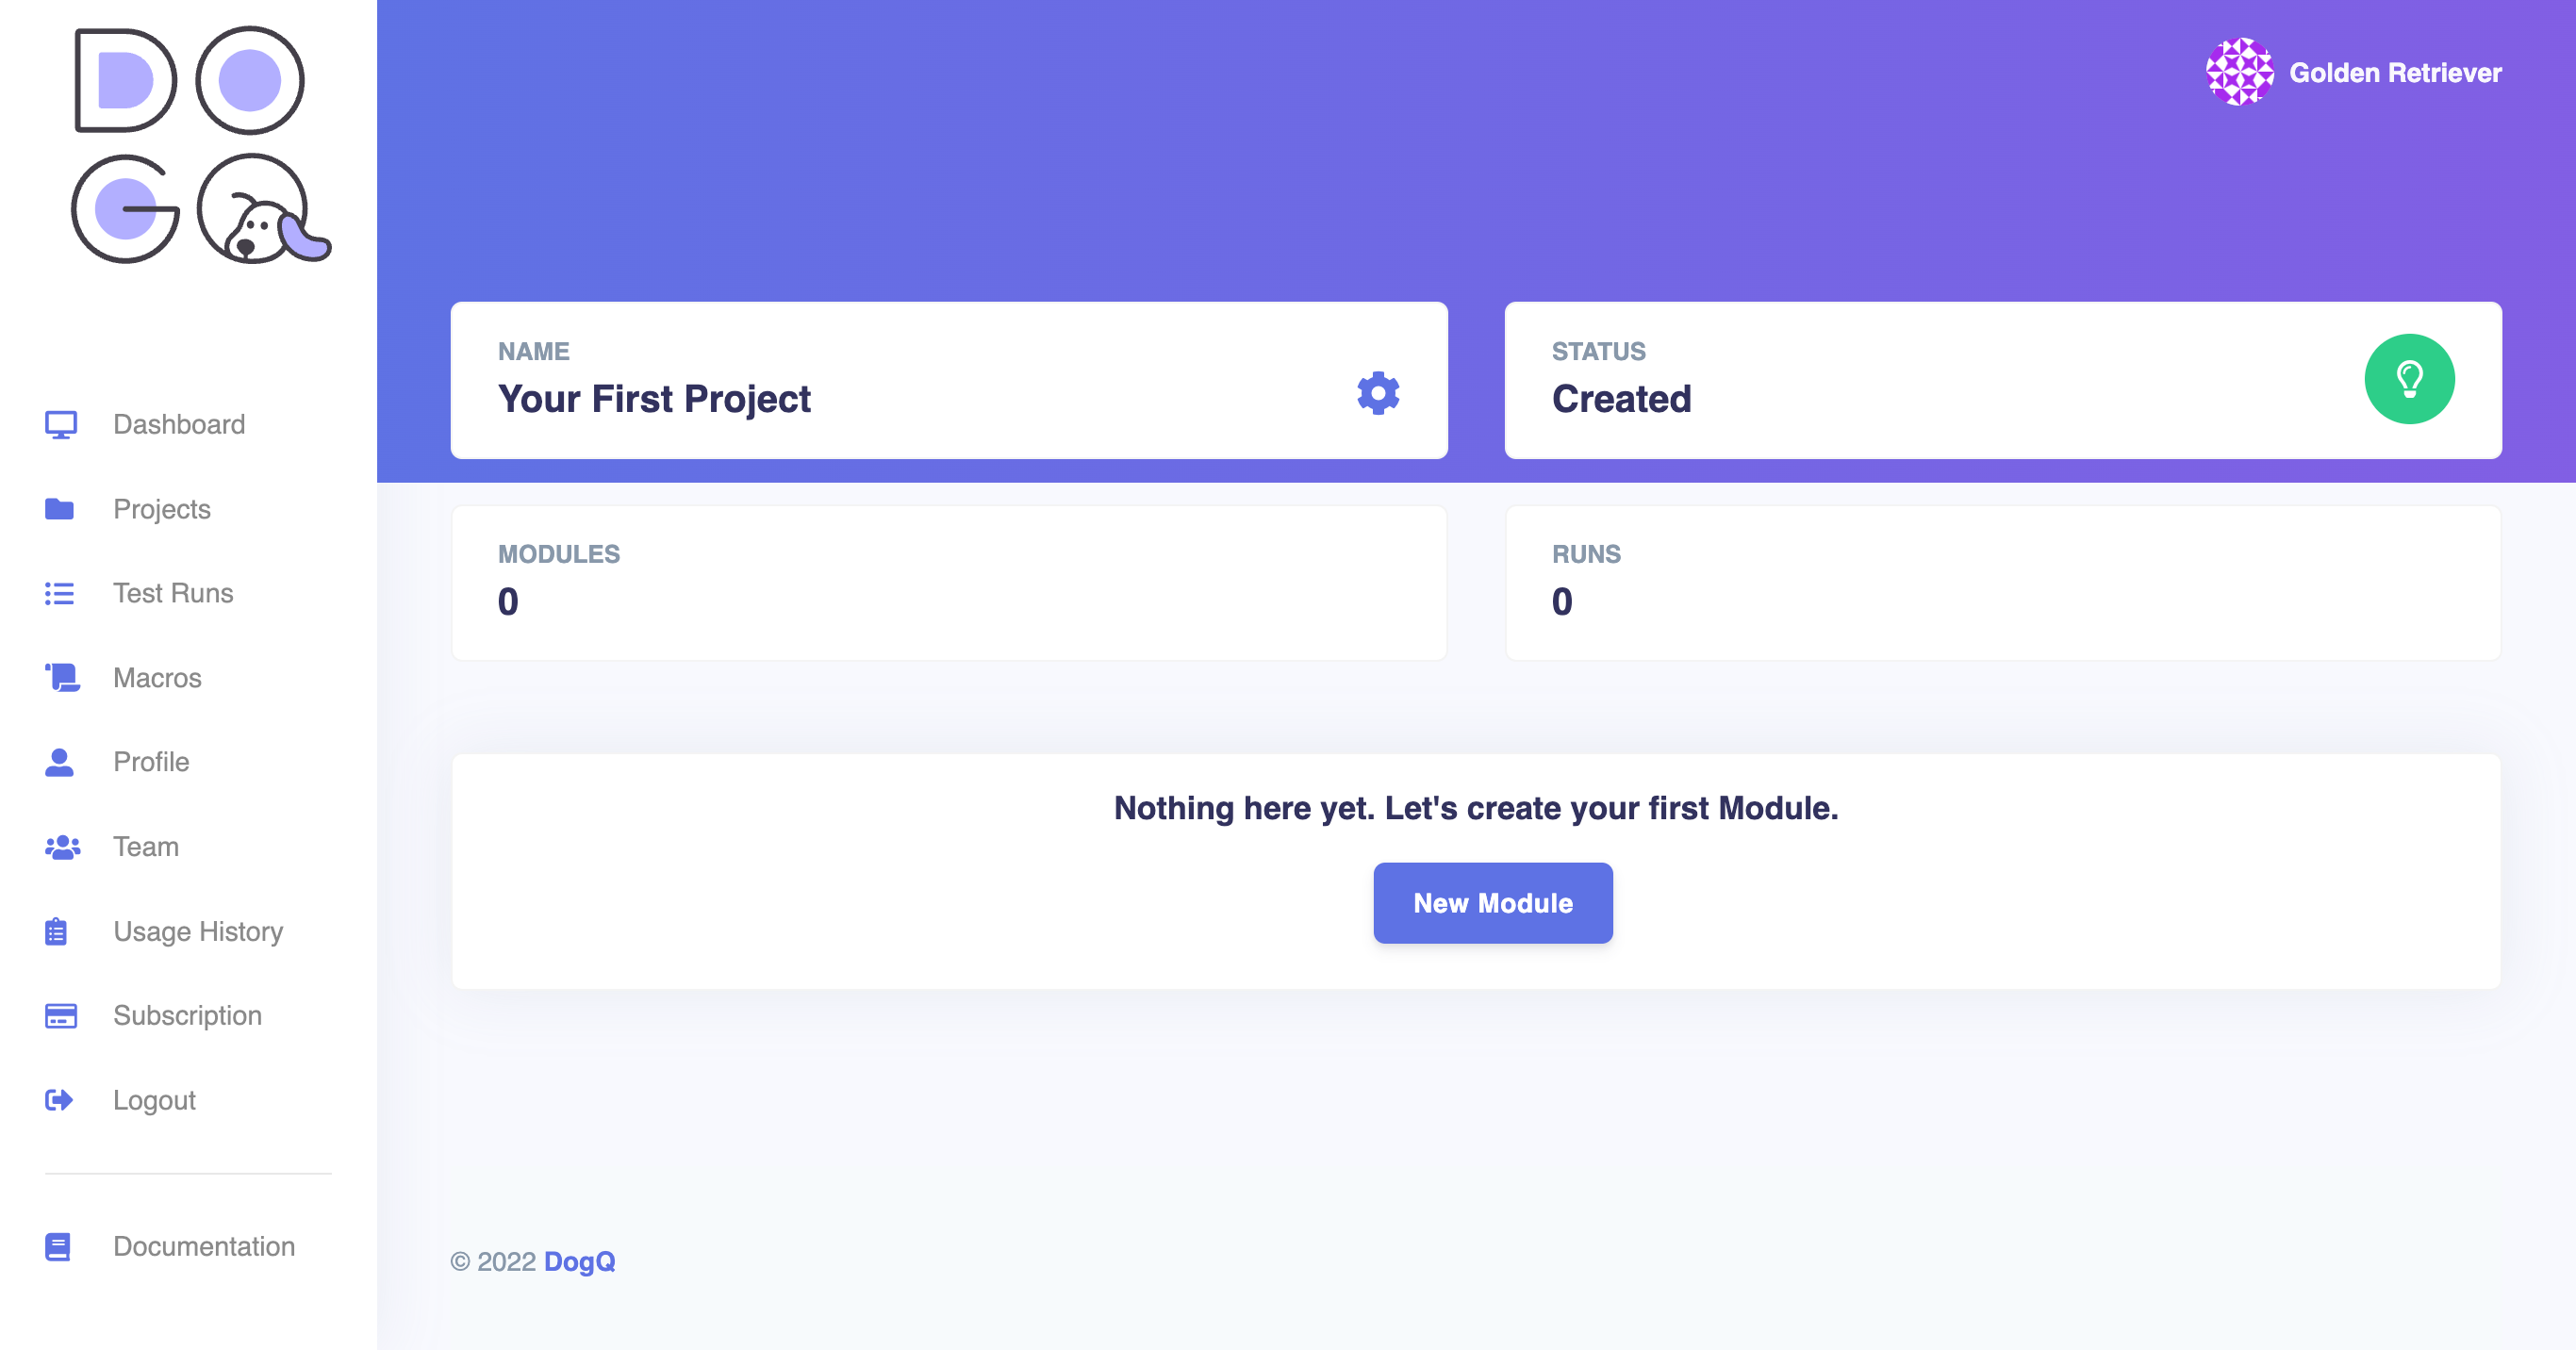
DogQ modules represent the actual modules of your app. They will contain the scenarios that you can execute individually or schedule in batches and then monitor the results in real-time.
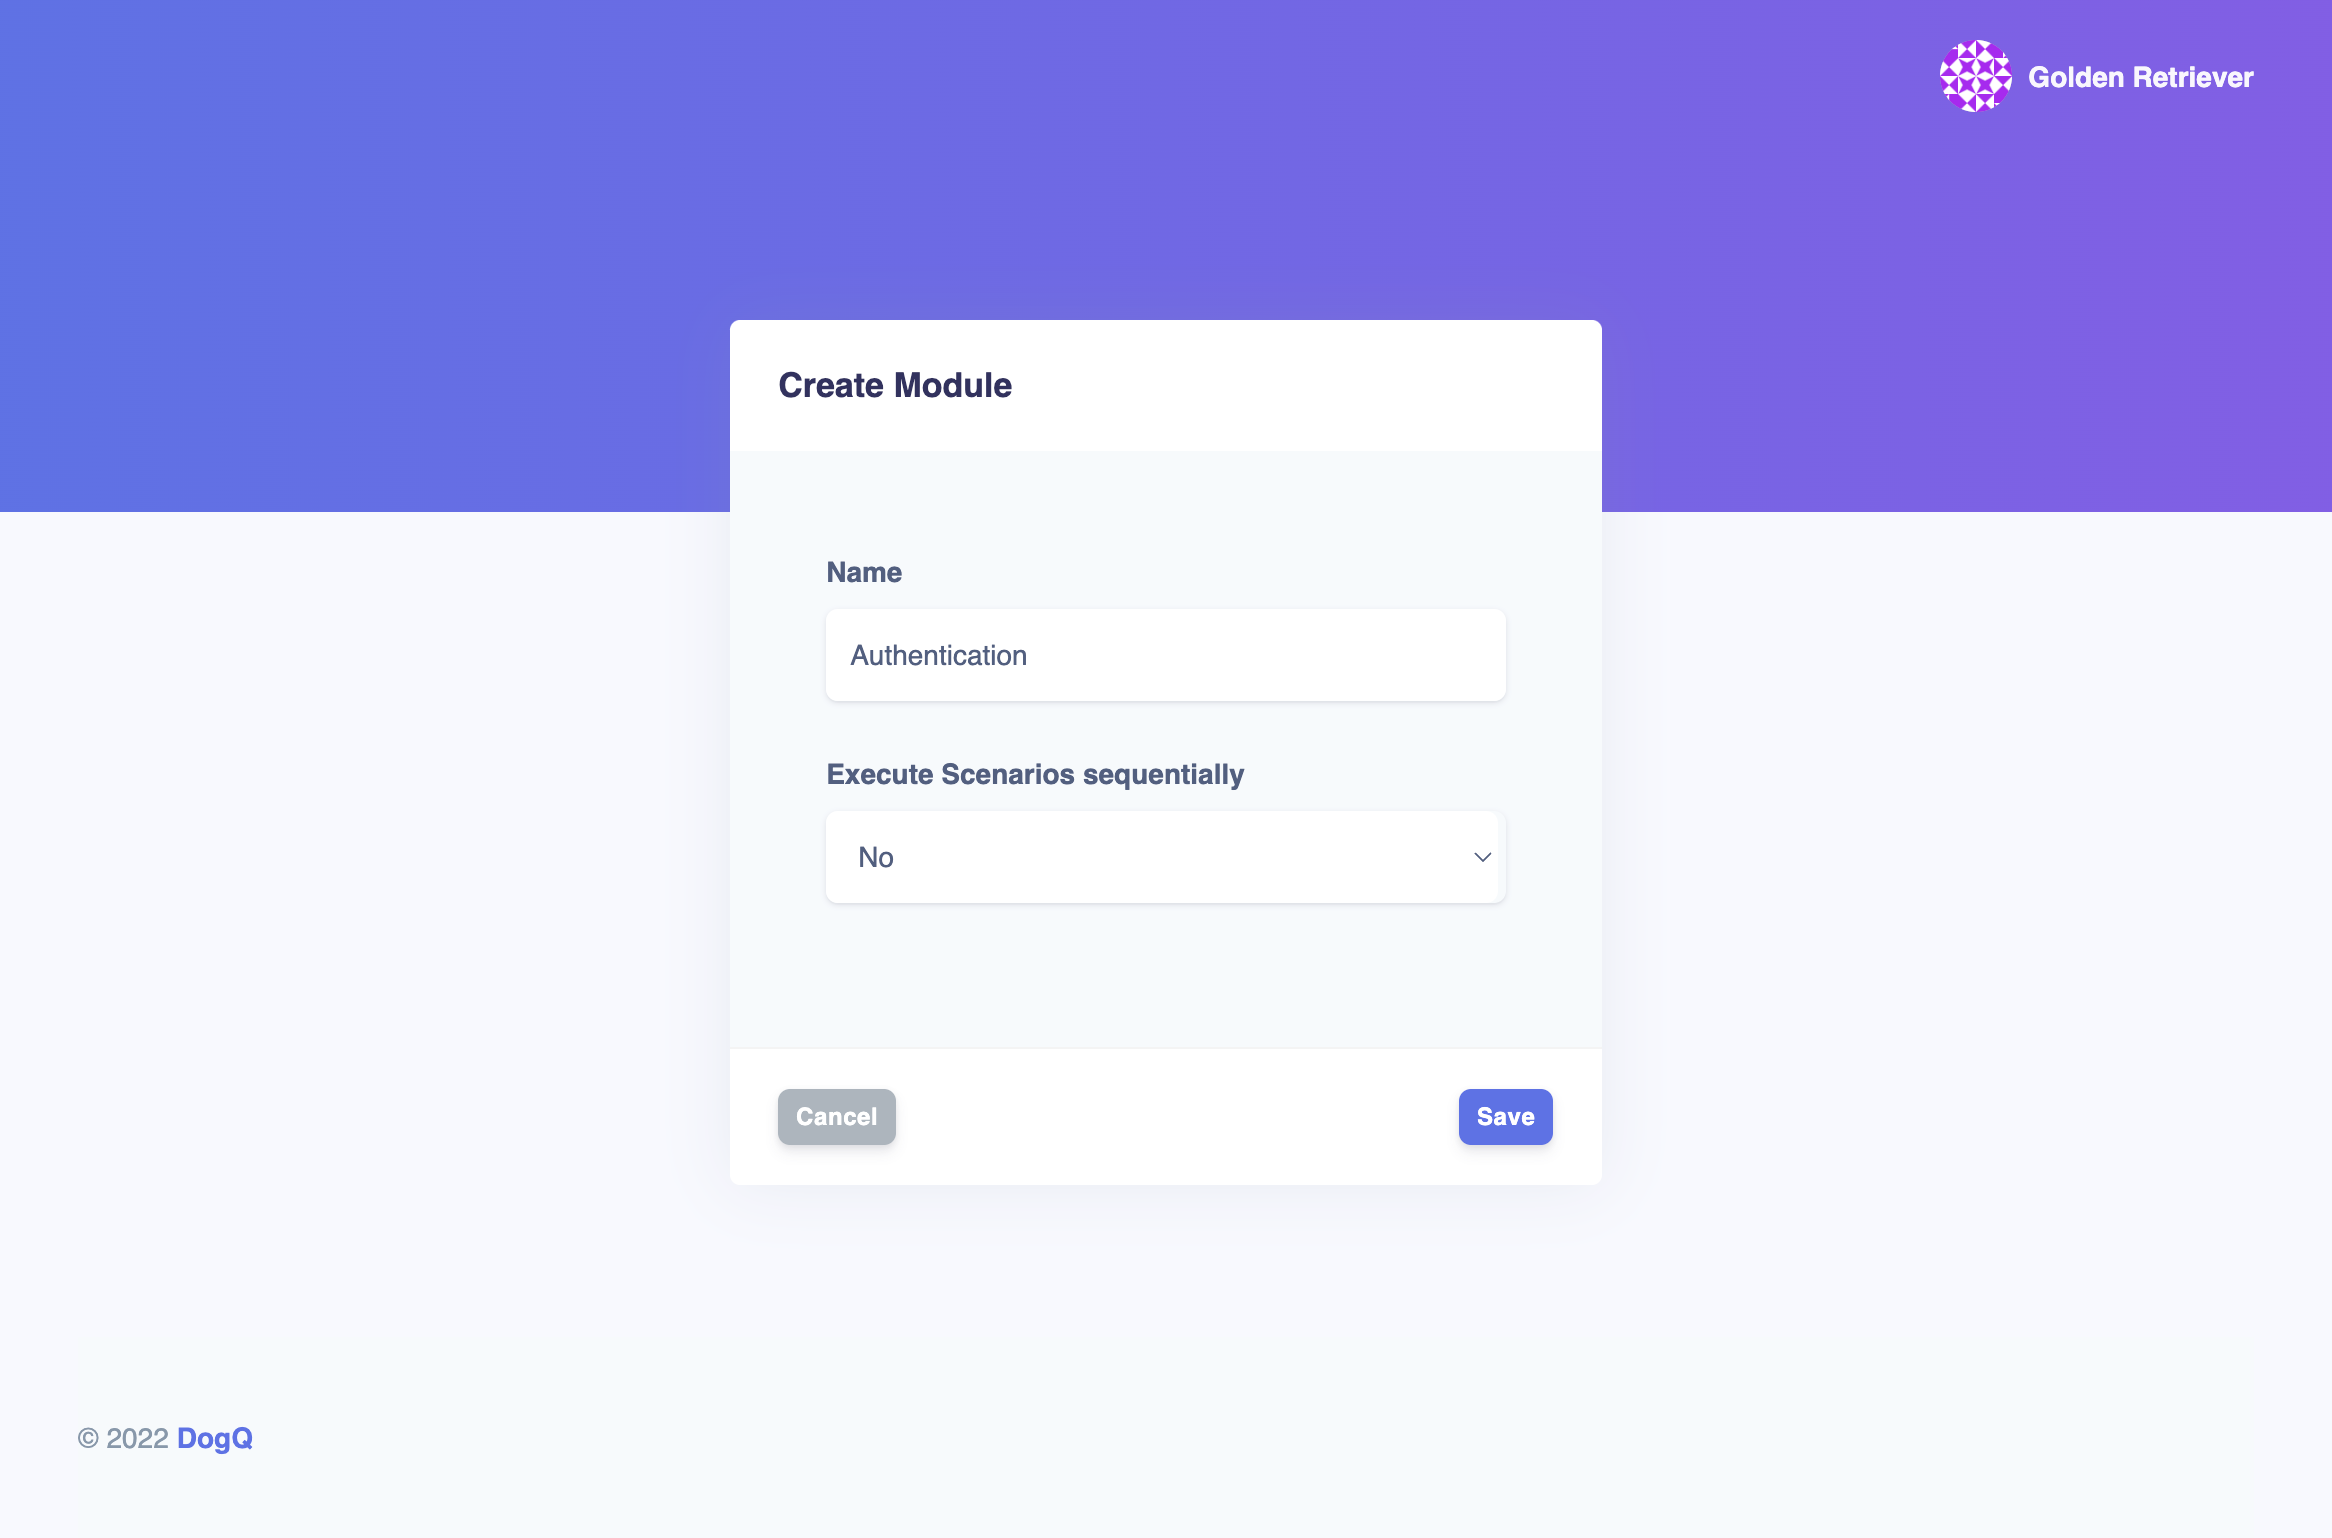
Let's add the first Module. In this case, we will be testing our app, so our first Module will be called "Authentication." Upon creating the Module, you will be redirected right into it, and you can start writing your first Scenario.
Create your first Scenario
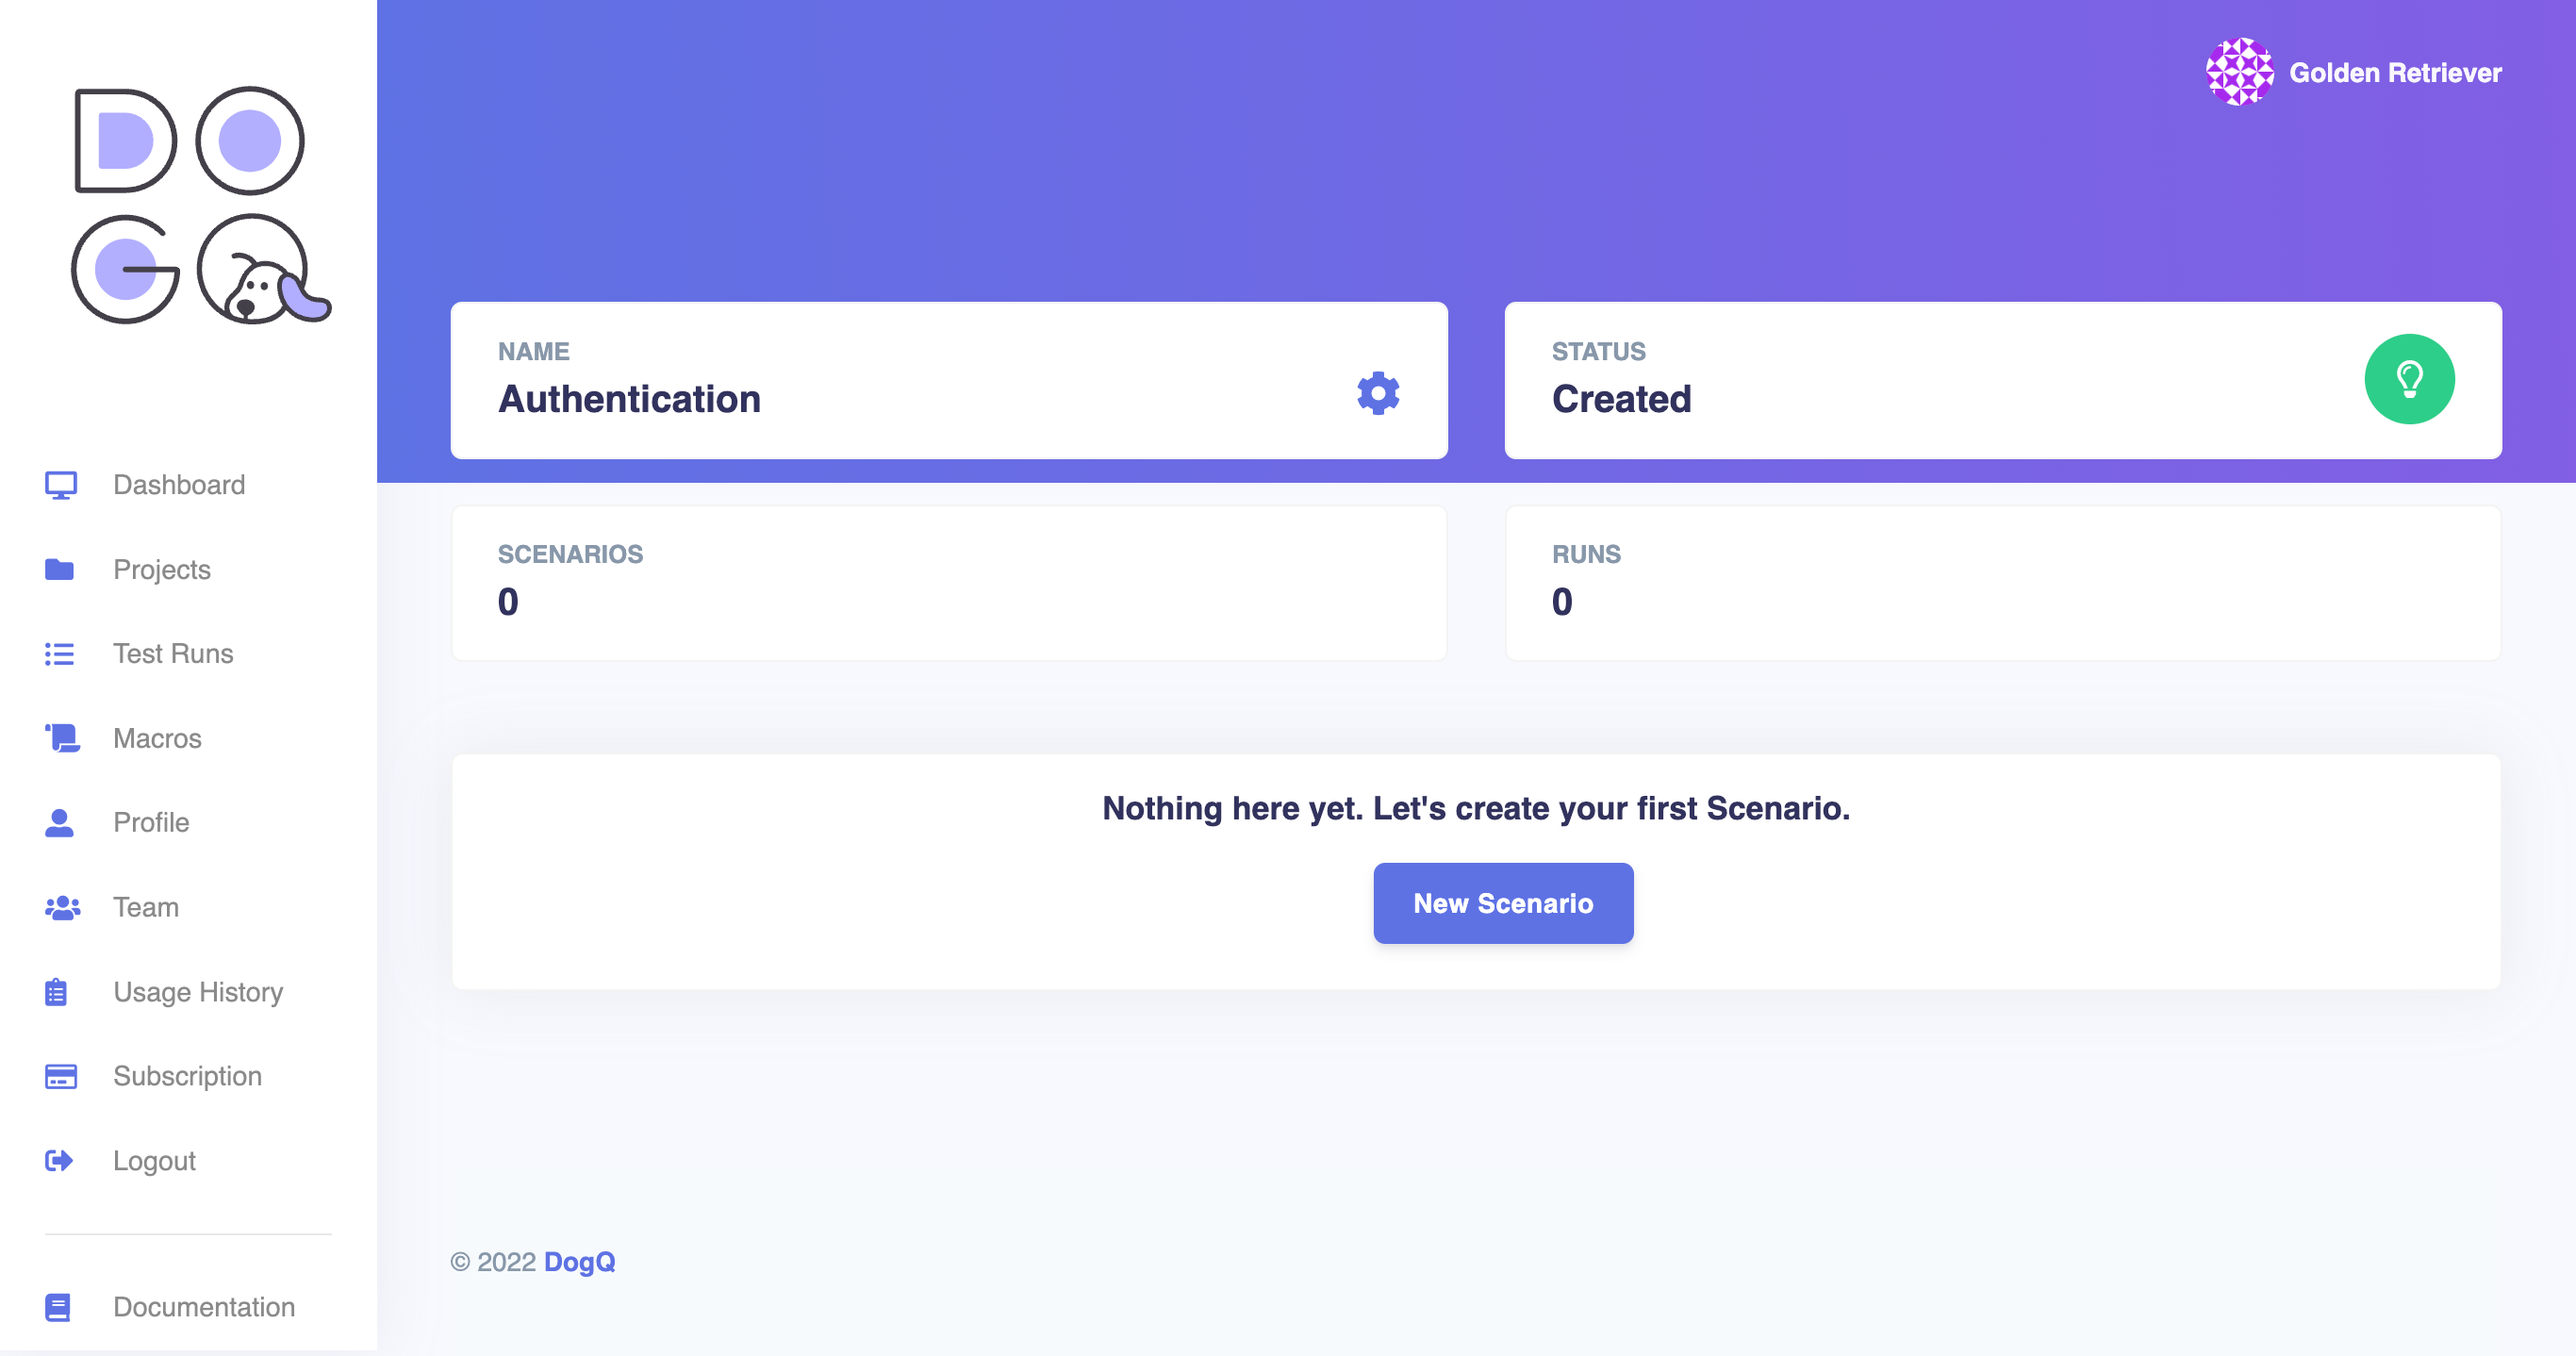
The Scenario is an actual Test Case within the DogQ. It contains a set of automated steps defined by you and are parts of your application modules. They can be scheduled in groups or executed on an individual basis.
After creating the ‘Authentication’ Module previously, you can click on the "New Scenario" button. You will need to specify the Scenario name, and then you will be redirected to your newly created
On this page, you can check the latest status of your Scenario (Status), see the number of Steps within this specific Scenario (Steps), and the overall number of this scenario executions within DogQ (Runs).
Let's add the first step now - you can do this by clicking on the "Add Step" button.
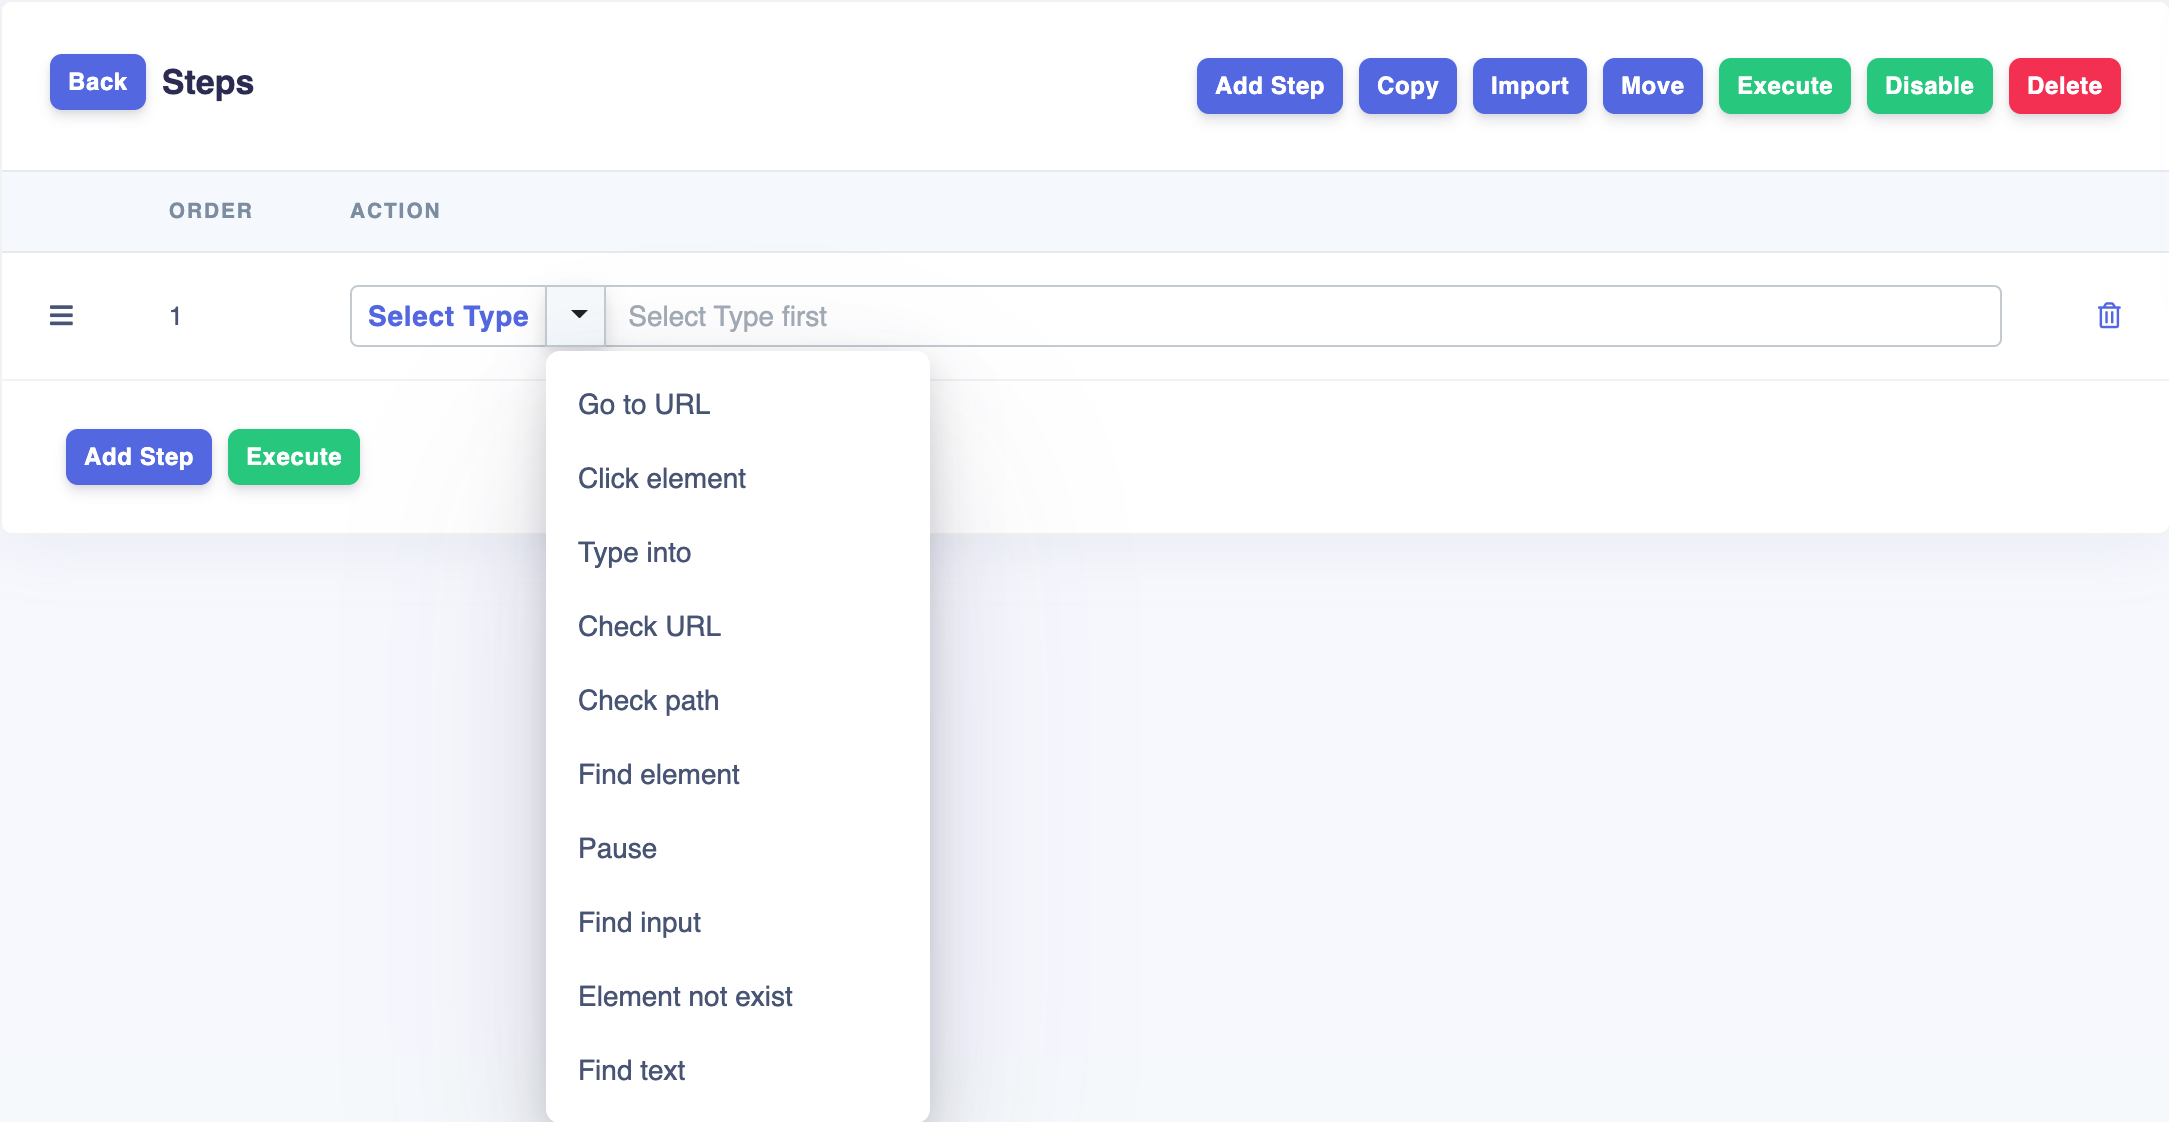
You can view different step types used within the Scenario by opening Select Type. A full description of the available test steps is available here.
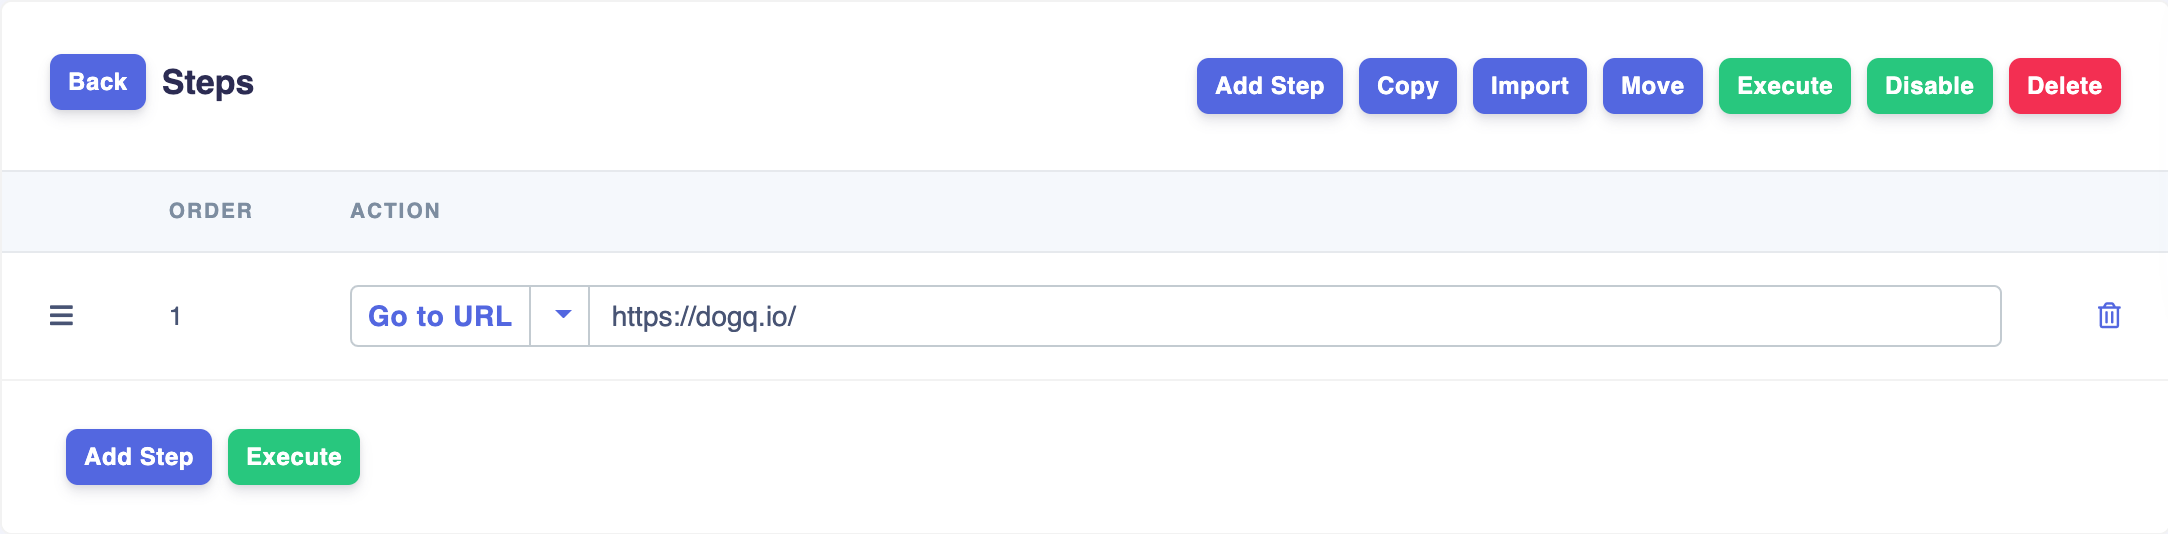
For our first Scenario, let's open the DogQ home page and validate that "Log In" button is present. For that, we need to define the first step as "Go to URL: and enter the address of the DogQ home page (https://dogq.io).
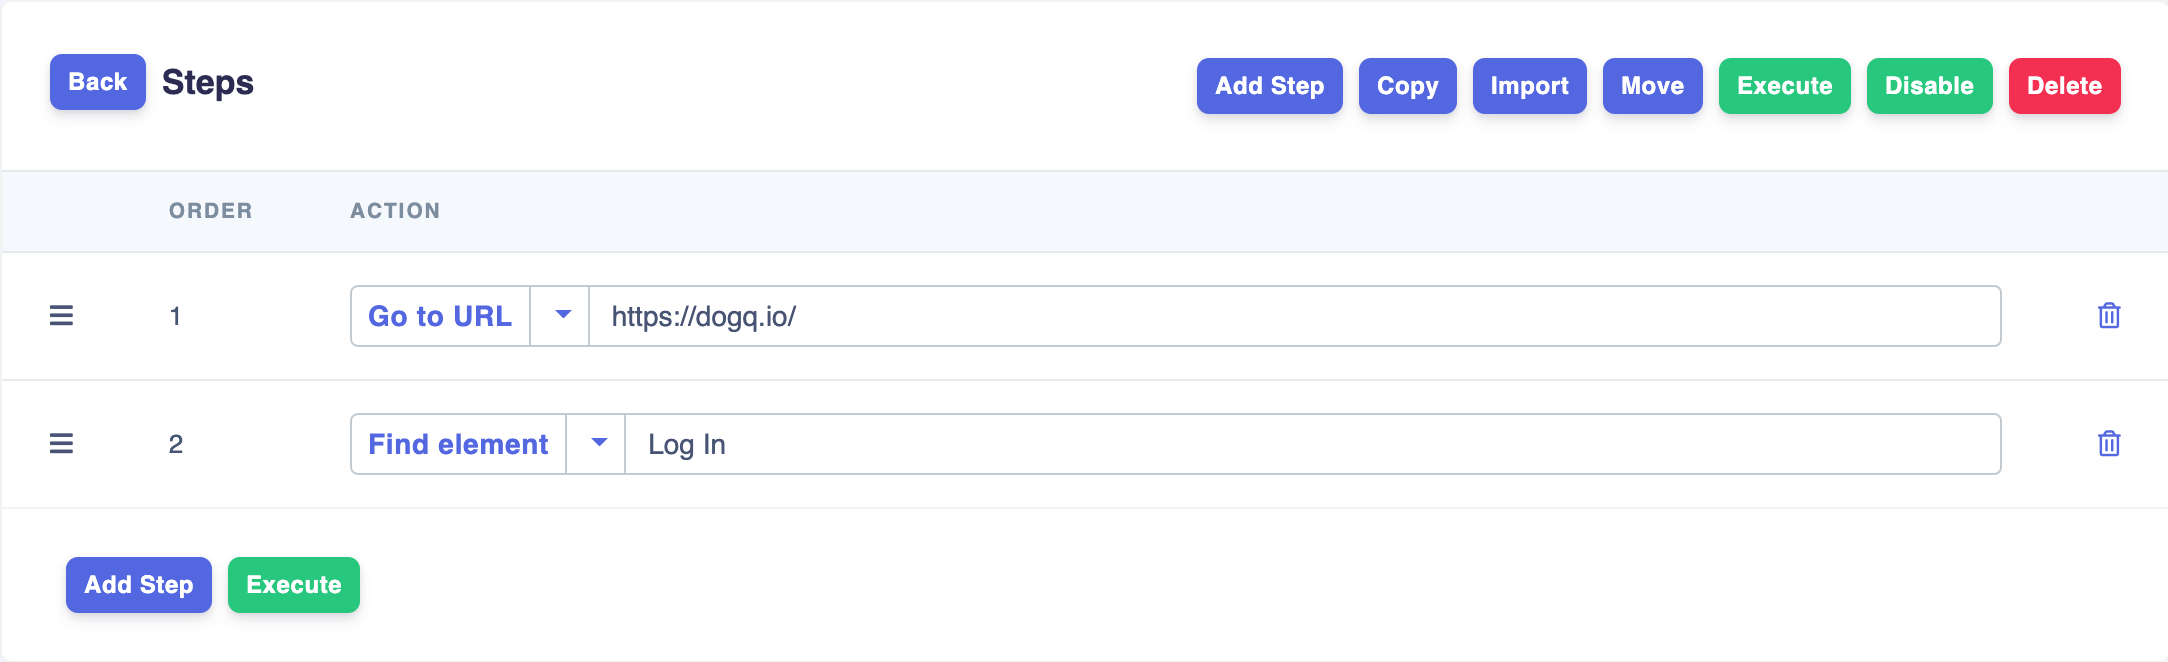
Now, let's add a Find Element step and locate the "Log In" button. To identify the button, we need to use the "locator"(find moro info on different locators here). In this case, let's use the button label as a locator ("Log In").
Now we have our first Scenario with the steps, and it's time to execute it!
Execute your first scenario
To execute your Scenario, you can click on the "Execute" button to immediately initiate the Test Run.

You can find the current execution status inside the Test Runs block on the Scenario page or in the dedicated Test Runs page that you can access from the navigation side panel.
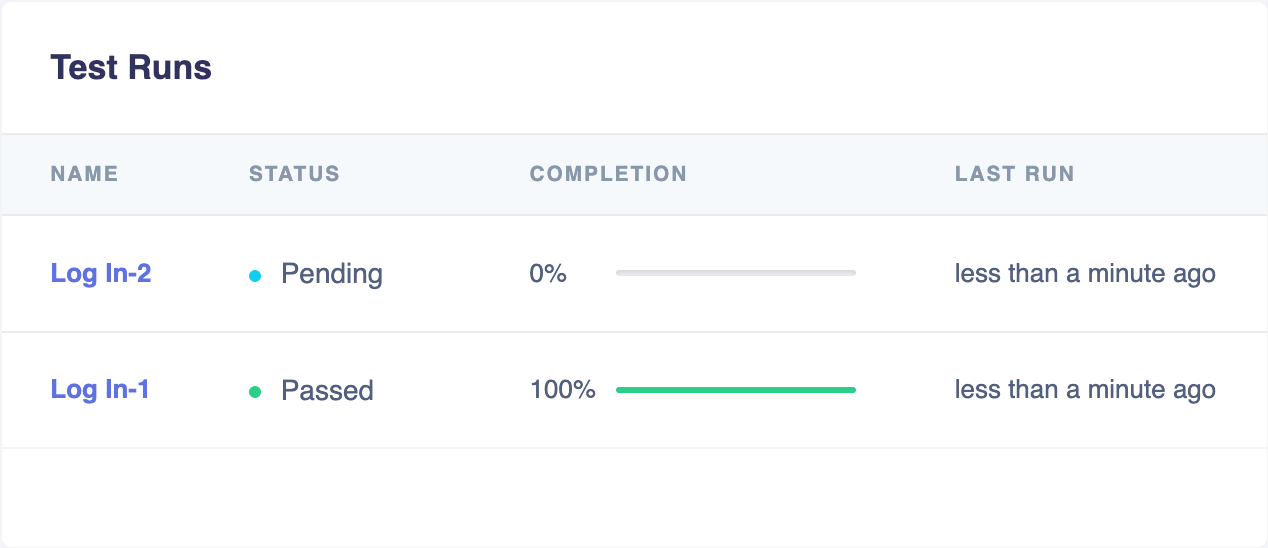
Depending on the progress, Test Executions can have one of the following statuses:
- Pending - The Scenario is scheduled and is in the execution queue.
- In Progress - Scenario execution started. You can also check the completion percentage.
- Passed - All steps completed successfully.
- Failed - One of the execution steps failed.
You can always check the execution details by clicking on the scenario name within the Test Runs block, or the Test Runs page.